

Steps to Prepare for Attaching a Hair Replacement System
Have you ever found that your hair replacement system bond broke down much earlier than you expected? Often, this issue isn’t due to the hair replacement system itself. Regardless of how strong your hair tapes or hair glue adhesives are, your hairpiece won’t last long if you don’t properly clean and prepare your scalp before attaching it. Even a minuscule amount of adhesive residue left on your scalp can compromise the bond of your hair replacement system. So, how should you properly prepare your scalp?
Steps for First-Time Attachment of a Hair Replacement System
- Shave the Bonding Area:
- Use an electric screen razor to remove any hair or stubble from the bonding area.
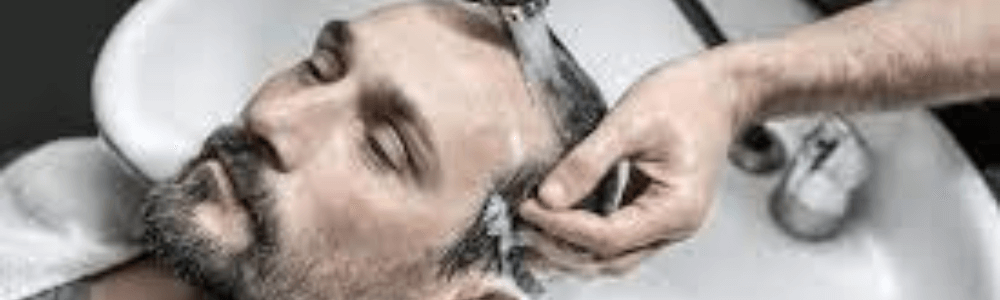
- Thoroughly Cleanse Your Scalp:
- Wash your entire head, hair, and scalp with a deep-cleansing shampoo to remove any residue. This helps eliminate sebum oils and balances your skin’s pH. You can later use an everyday shampoo for maintenance.
- Dry Your Scalp Completely:
- Use a towel or a blow dryer to fully dry your head and scalp, ensuring all moisture is removed.
Steps for Re-Bonding a Hair Replacement System
- Remove Old Adhesive Residue:
- Use a wet towel or cloth to wipe off any visible traces of hairpiece adhesive residue from your scalp. For oily residue, spray a mist containing isopropyl alcohol to emulsify it. Then, use a paper towel (avoid toilet paper as it is too weak) to rub vigorously until your scalp is clear. A fine-tooth nit comb can also help with stubborn residue.
- Thoroughly Cleanse Your Scalp Again:
- Wash your scalp and any existing hair thoroughly. Remaining adhesives can destroy and reduce the bond’s duration and strength. Use a deep-cleansing shampoo and an exfoliating scalp scrub, such as an exfoliating glove, while showering. Rinse and repeat 4-5 times, or at least twice, to ensure all adhesive residue is eliminated.
- Dry and Shave the Bonding Area:
- Fully dry your head and scalp with a towel or a blow dryer. Use an electric screen razor to closely remove any hair or stubble from the bonding area, as in the first-time bonding process.
- Apply a Waterproof Sealant:
- Apply a layer of waterproof sealant to protect your skin and support adhesion with the hairpiece tape or adhesive. This is particularly helpful when engaging in activities that cause sweating.
After proper scalp preparation, you are ready to attach your hair replacement system.
Preventing Allergic Reactions
To prevent allergic reactions, consider the following steps:
- Use Hypoallergenic Adhesive Tapes:
- Opt for hypoallergenic tapes designed for sensitive skin to reduce the risk of allergies.
- Apply Scalp Care Solutions:
- Use scalp care solutions or serums formulated to soothe and protect the skin, reducing the likelihood of irritation.
Handling Allergic Reactions
If you experience an allergic reaction, follow these steps:
- Remove the Hair Replacement System Immediately:
- Gently remove the toupee or hairpiece to prevent further irritation.
- Cleanse the Affected Area:
- Wash the area with a mild, non-irritating shampoo to remove any remaining adhesive.
- Apply Soothing Treatments:
- Use over-the-counter hydrocortisone cream or antihistamine cream to reduce inflammation and itching. Aloe vera gel can also help soothe irritated skin.
- Consult a Professional:
- If the reaction is severe or persists, seek advice from a dermatologist.
By following these steps, you can ensure a secure and lasting bond for your hair replacement system and maintain the health of your scalp. If you have any other questions, please feel free to contact us.
I hope this revised blog helps you attach your hair replacement system at home. If you have any further questions, please feel free to contact us.
Email: [email protected]
Whatsapp: +8618562652363
Pro-Flex II Tape
A very popular hypo-allergenic tape. Made with Urethane for a very flexible bond
Also popular with the hair extension